Offscreen Rendering
Note
If you experience problems running simple-3dviz on a headless server, please follow the instructions in ModernGL documentation.
simple-3dviz, due to ModernGL providing the OpenGL, does not require any
graphical user interface for rendering the content of a scene. In particular,
it provides three different ways to render the content of the framebuffer,
either with the two helper functions show() and render() or with the
render() method of the Scene class:
show(): Creates a window to display the scene and implements a live scene viewer.render(): Renders the content of the scene and performs set ofBehavioursfor a given number of frames, without launching any GUI. Note thatrender()implements the same functionality asshow().Scene.render(): Renders the content of the scene without launching any GUI.
show() and render()
Calling the show() function, launches a window that displays a list of
Renderables and animates the scene based on a list of Behaviours. It is
possible to specify the position of the camera, its viewing direction, the
direction that indicates the "up" direction as well as the position of the
diffuse light source. Finally, you can also specify the size of the launched
window as well as its background color. For a more detailed analysis on the
arguments, checkout out the API Docs.
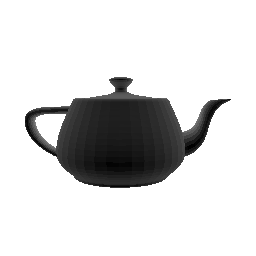
>>> from simple_3dviz import Mesh
>>> from simple_3dviz.window import show
>>> from simple_3dviz.behaviours.movements import CameraTrajectory
>>> from simple_3dviz.behaviours.trajectory import Circle
>>> m = Mesh.from_file("models/teapot.obj", color=(0.8, 0.8, 0.8, 1.0))
>>> m.to_unit_cube()
# Now show the content of the scene and also move the camera in a circular
# trajectory around the mesh using the CameraTrajectory behaviour.
>>> show(
... m,
... size=(256,256),
... camera_position=(0.0, 0.15, -1.5),
... up_vector=(0, 1, 0),
... behaviours=[CameraTrajectory(Circle([0, 0.15, 0], [0, 0.15, 1.5], [0, 1, 0]), speed=0.01)]
... )
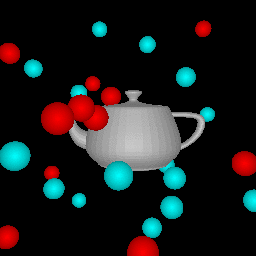
# Now we will add an additional a Spherecloud
>>> from simple_3dviz import Spherecloud
>>> centers = np.random.uniform(-0.6, 0.6, (30,3))
>>> colors = np.array([[1., 0, 0, 1], [0, 1, 1, 1]])[np.random.randint(0, 2, size=30)]
>>> sizes = np.ones(30)*0.05
>>> s = Spherecloud(centers, colors, sizes)
# We scale the mesh m by 75%
>>> m.scale(0.75)
# Note that now we make the camera move clockwise and we turn the window
# background to black
>>> show(
... [m, s],
... size=(256,256),
... background=(0.0, 0.0, 0.0, 1.0),
... camera_position=(0.0, 0.15, -1.5),
... up_vector=(0, 1, 0),
... behaviours=[CameraTrajectory(Circle([0, 0.15, 0], [0, 0.15, -1.5], [0, 1, 0]), speed=0.01)]
... )
The render() function implements the same functionality as show() without
the need for any GUI. Additionally, you need to specify the number of frames to
be rendered. To store the rendered frames on the hard disk it suffices to call
the SaveFrames behaviour.
>>> from simple_3dviz.utils import render
>>> from simple_3dviz.behaviours.io import SaveFrames
>>> render(
...     [m, s],
...     n_frames=200,
...     size=(256,256),
...     background=(0.0, 0.0, 0.0, 1.0),
...     camera_position=(0.0, 0.15, -1.5),
...     up_vector=(0, 1, 0),
...     behaviours=[
...         CameraTrajectory(Circle([0, 0.15, 0], [0, 0.15, -1.5], [0, 1, 0]), speed=0.01),
...         SaveFrames("/tmp/frame_{:03d}.png")
...     ]
... )
Scene.render()
Another alternative for rendering a scene is with the render() class method of
the Scene object. Note that with this function it is not possible to specify
any animation, as it simply renders the framebuffer.
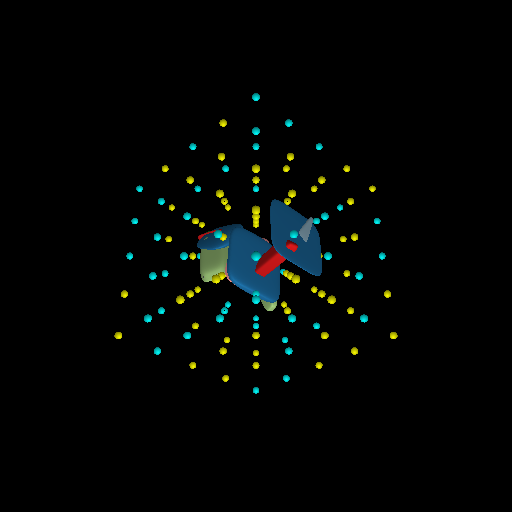
>>> from simple_3dviz import Scene
>>> from simple_3dviz import Mesh, Spherecloud
>>> from simple_3dviz.utils import save_frame
>>> scene = Scene(background=(0.0, 0.0, 0.0, 1.0), size=(512, 512))
# Load a mesh from a file
>>> m = Mesh.from_file("tests/primitives.ply")
>>> scene.add(m)
# Create a spherecloud
>>> x = np.linspace(-0.5, 0.5, num=5)
>>> centers = np.array(np.meshgrid(x, x, x)).reshape(3, -1).T
>>> colors = np.array([[1, 1, 0, 1],
>>> [0, 1, 1, 1]])[np.random.randint(0, 2, size=centers.shape[0])]
>>> sizes = np.ones(centers.shape[0])*0.02
>>> s = Spherecloud(centers, colors, sizes)
>>> scene.add(s)
>>> scene.render()
>>> save_frame("scenes_renderable_1.png", scene.frame)
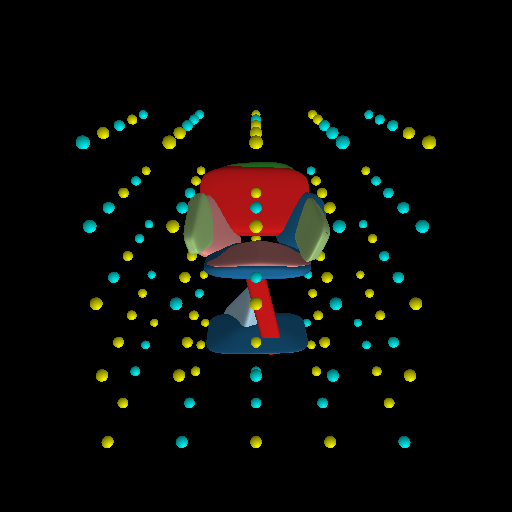
>>> scene.camera_position = (0, 0.72, -2.3)
>>> scene.render()
>>> save_frame("scenes_renderable_2.png", scene.frame)